My Blinkies


Love the blog? Take my blinkie and link back to me!
April 8, 2009
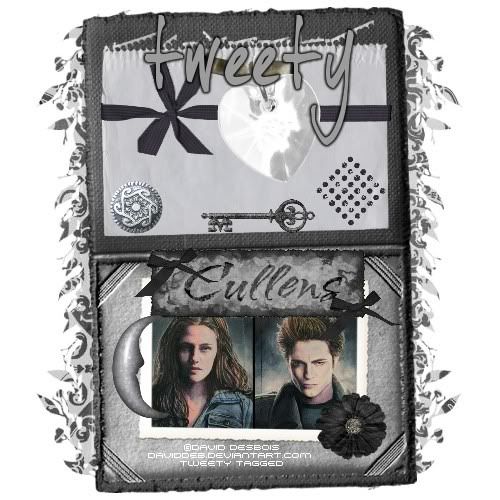
Midnight
Feel free to use my tutorial in any way you would like. Although it is my ideas that will guide you, please feel free to do whatever you choose with it!
This tutorial assumes you have a working knowledge of PSP.
Needed supplies:
Scrap Kit of choice or the one I am using. This kit is by Pimp'd Tag Scraps and can be purchased at Sophisti-Scraps called The Saga : Add On : Midnight.
Masks of Choice: the masks I used came from Chelle under downloads. Her site can be found here.
I used WSL_251.
Plugins: EyeCandy4000, Gradient Glow
Image of choice. My image is by David Desbois. You can visit his deviantart site here. I have permission from him to use his artwork in my tutorials.
Open all supplies needed for this tutorial. Add the mask to your mask file or open them in PSP. I use these quite a bit.
Copy and paste pp7 as a new layer. Layers, Load/Save Mask, Load mask from Disk, choose Mask251 by Chelle. Rotate 90 degrees left.
Copy and paste the book-frame. Resize to fit the tag. Rotate 90 degrees left. Copy and paste your image of choice and resize to fit. Click inside the frame using your magic wand and selections, modify, expand by 5. Selections, invert. Hit delete on your image layer.
Add your elements of choice. See tag for exact placement and resize as necessary. I added:
book-paper rotated 90 degrees left to the top of the book-frame, centered.
staple to the center of the book-paper.
lil-heart-charm to the staple and erase part of the charm hook to make it appear to be hooked on the staple.
wrap-2 rotated 90 degrees left under the lil-heart-charm layer.
stamp-02 to the bottom of the book-paper layer on the right.
vintage-key to the bottom of the book-paper layer in the middle.
button to the bottom of the book-paper layer on the left.
tag-cullens to the middle of the book-frame centered.
moon to the left bottom of the frame layer.
flower-03 to the right bottom of the picture frame.
bow-02 to the top left of the tag-cullens. Duplicate it and move to the bottom right.
Add any other elements of your choice.
Drop shadow your layers and merge them where you would like.
Add your copyright at this time for the scrapkit.
Add your text of choice, I used Joehand (Alice Cullens' Font). You can google to find it. I added a medium 3.0 black glow to my font.
Hope you enjoyed this tutorial! Please feel free to send me your results!

Subscribe to:
Post Comments (Atom)
About Me

Want to receive some of the tutorial tags created by me?

Click to join tweetytags
0 comments:
Post a Comment