Follow Me
Tag Corner
Join TagCorner! I did!
August 12, 2010
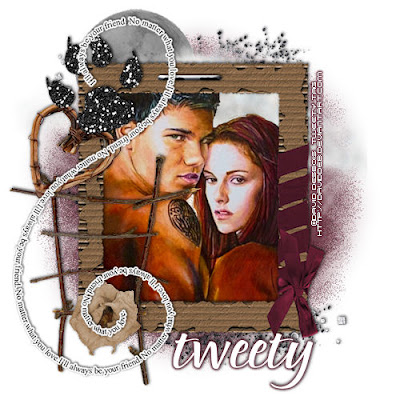
Forever Friends Bella & Jacob
Feel free to use my tutorial in any way you would like. Although it is my ideas that will guide you, please feel free to do whatever you choose with it!
This tutorial assumes you have a working knowledge of PSP.
Needed supplies:
Scrap Kit of choice or the one I am using called Forever Friends Bella & Jacob. This kit is a collaboration between Grunge & Glitter and Yarrow, and can be purchased at Digital Chaos.
Tube: Artwork © David Desbois. Please visit his deviantart site. I have permission from him to use his artwork.
Masks of Choice: the masks I used came from Chelle. Her site can be found here.
I used WSL_119.
Plugins: If so desired I used EyeCandy4000, Gradient Glow, which is no longer available to purchase, but should be able to be found in the new EyeCandy 6.
Open frame1 from Grunge. Canvas size 600x600 image center. Add a layer and flood fill white. Drag to bottom. Open Paper02 from Yarrow add as a new layer. Drop shadow frame 1, 1, 80, 5. Using your selection tool, select around the frame. Invert and delete the paper layer. Add Paper05 by Yarrow and add your mask. Merge group.
Add your tube of choice under the frame layer and drop shadow as above.
Add your elements of choice. Resize elements as necessary. I added:
From Yarrow:
GlitterSpray03 above the mask layer.
GlitterSpill above the spray layer.
StickLadder above the frame layer to the bottom left.
Staple01 to the top middle of the frame layer.
HeartElement to the middle on the left of the frame layer.
GlitterPawPrint02 to the top left of the frame.
WordArt01 to the middle left, fat white 3.0 glow.
From Grunge:
moon&cloud under the frame and paper layer at the top middle.
flower1 bottom left on top of the ladder.
Add any other elements of your choice. Drop shadow elements of choice. Merge any layers you choose together.
Add your text of choice, I used Pointed Brush, a pay font, and then added a 3.0 medium maroon gradient glow with the drop shadow as above.
Add your copyright at this time. Resize if wanted.
Hope you enjoyed this tutorial! Please feel free to send me your results!

Labels:
Twilight
|
0
comments
July 20, 2010
Breaking Twilight
Feel free to use my tutorial in any way you would like. Although it is my ideas that will guide you, please feel free to do whatever you choose with it!
This tutorial assumes you have a working knowledge of PSP.
Needed supplies:
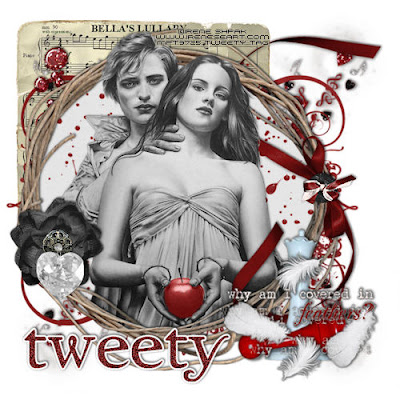
Scrap Kit of choice or the one I am using called Breaking Twilight. This kit is by Sarah and can be purchased at PMTw/S.
Tube: Artwork © Irene Shpak . In order to use the image in this tutorial you MUST purchase it from MPT.
Masks of Choice: the masks I used came from Vix under goodies. Her site can be found here.
I used Vix_424.
Plugins: If so desired I used EyeCandy4000, Gradient Glow, which is no longer available to purchase, but should be able to be found in the new EyeCandy 6.
Open sb_pmt_breaking twilight_frame1. Canvas size 600x600 image center. Add a layer and flood fill white. Drag to bottom. Open sb_pmt_breaking twilight_pp8 add as a new layer. Drop shadow frame 1, 1, 80, 5. Using your selection tool, select around the frame. Invert and delete the paper layer. Add sb_pmt_breaking twilight_pp3 and add your mask. Merge group, move a bit left to center under the paper layer.
Add your tube of choice under the frame layer and drop shadow as above. Duplicate, and erase portions sticking out that you don't wish to have seen. Using your selection tool, select the apple and change the color using your manual correction tool.
Add your elements of choice. Resize elements as necessary. I added:
sb_pmt_breaking twilight_music and love_glitter to the top right under the paper layer. Rotate 45 degrees, Duplicate, mirror, merge down. Duplicate the group, flip and merge together.
sb_pmt_breaking twilight_song mat to the top left corner under the frame.
sb_pmt_breaking twilight_blood glitter1 on top of the song mat top left corner.
sb_pmt_breaking twilight_chess_pieces to the bottom right on top of the frame layer.
sb_pmt_breaking twilight_flower1 to the bottom left of the frame.
sb_pmt_breaking twilight_heart charm on top of the flower layer.
sb_pmt_breaking twilight_wordart_2 on top of the chess pieces.
sb_pmt_breaking twilight_button1 on top of the ribbon on the middle left of the frame layer.
Add any other elements of your choice. Drop shadow elements of choice. Merge any layers you choose together.
Add your text of choice, I used Zephyr a pay font, and then added 56% monochrome uniform noice, and a 3.0 fat white gradient glow with the drop shadow as above.
Add your copyright at this time. Resize if wanted.
Hope you enjoyed this tutorial! Please feel free to send me your results!

Labels:
Twilight
|
0
comments
July 14, 2010
Forbidden Love

Feel free to use my tutorial in any way you would like. Although it is my ideas that will guide you, please feel free to do whatever you choose with it!
This tutorial assumes you have a working knowledge of PSP.
Needed supplies:
Scrap Kit of choice or the one I am using called Forbidden Love. This kit is by Grunge and Glitter Scraps and Dark Yarrow and can be purchased at Digital Chaos.
Tube: Artwork © Katerina Koukiotis . In order to use the image in this tutorial you MUST purchase it from DSI.
Plugins: If so desired I used EyeCandy4000, Gradient Glow, which is no longer available to purchase, but should be able to be found in the new EyeCandy 6.
Open frame03 in Yarrow's portion. Shift+D to duplicate. Canvas size 600x600 image center resize frame about 75%. Add a layer and flood fill white. Drag to bottom. Open GG_ForbiddenLove_paper21 add as a new layer. Resize by about 70%. Drop shadow frame 1, 1, 80, 5. Using your selection tool, select around the frame. Invert and delete the paper layer.
Add your tube of choice under the frame layer and drop shadow as above.
Add your elements of choice. Resize elements as necessary. I added:
GG_ForbiddenLove_blood2 under the frame bottom left corner.
GG_ForbiddenLove_bow1 above the frame layer, top left corner of the frame.
GG_ForbiddenLove_rosegarland bottom of the frame over the bow layer.
GG_ForbiddenLove_tag2 top left under the bow layer.
GG_ForbiddenLove_diamondheartcharm under the bow layer.
GG_ForbiddenLove_wordart4 top middle, fat white 3.0 glow.
Butterfly04 top right of the frame layer.
GlitterSplatt01 under the frame top left. Duplicate, mirror and flip.
GlitterSplatt02 under the frame bottom right. Duplicate mirror and flip.
GlitterDoodle01 top middle of the frame.
GlitterDoodle02 top middle of the frame, mirrored.
Add any other elements of your choice. Drop shadow elements of choice. Merge any layers you choose together.
Add your text of choice, I used JackieO ROB a pay font, and then added a 3.0 fat white gradient glow with the drop shadow as above.
Add your copyright at this time.
Hope you enjoyed this tutorial! Please feel free to send me your results!

Labels:
Twilight
|
0
comments
April 10, 2010
I ♥ Twilight

Feel free to use my tutorial in any way you would like. Although it is my ideas that will guide you, please feel free to do whatever you choose with it!
This tutorial assumes you have a working knowledge of PSP.
Needed supplies:
Scrap Kit of choice or the one I am using called I ♥ Twilight. This kit is by Grunge and Glitter Scraps and can be purchased at Grunge and Glitter.
Tube: Artwork © Irene Shpak. In order to use the image in this tutorial you MUST purchase it from MPT.
Plugins: If so desired I used EyeCandy4000, Gradient Glow, which is no longer available to purchase, but should be able to be found in the new EyeCandy 6.
Open frame3. Shift+D to duplicate. Canvas size 600x600 image center resize frame about 75%. Add a layer and flood fill white. Drag to bottom. Open paper12 add as a new layer. Resize by about 70%. Drop shadow frame 1, 1, 80, 5. Using your selection tool, select around the frame. Invert and delete the paper layer.
Add your tube of choice under the frame layer and drop shadow as above.
Add your elements of choice. Resize elements as necessary. I added:
moon&cloud top left under the frame and paper layer.
doodle top right of tag above moon&cloud layer.
trailofrosepetals bottom right
rose top left still under the frame.
flair1 bottom left of the frame above the frame layer.
key bottom left on top of flair.
button1 above flair by itself.
wordart5 to top right above the frame layer.
wordart6 rotated to left 90 degrees and moved to the left above the button.
Add any other elements of your choice. Drop shadow elements of choice. Merge any layers you choose together.
Add your text of choice, I used Pointed Brush which you should be able to find via google and then added a 3.0 medium red gradient glow with the drop shadow as above.
Add your copyright at this time.
Hope you enjoyed this tutorial! Please feel free to send me your results!

Labels:
Twilight
|
0
comments
March 16, 2010
Tag with my tutorial

Pennyjelly made a tag with my tutorial and added her own twist! Love the tag girl! Had to show it off! Thanks!

Labels:
Twilight Results
|
0
comments
March 13, 2010
Wolf Girl

Feel free to use my tutorial in any way you would like. Although it is my ideas that will guide you, please feel free to do whatever you choose with it!
This tutorial assumes you have a working knowledge of PSP.
Needed supplies:
Scrap Kit of choice or the one I am using. This kit is by Pimp'd Designz and can be purchased at Sophisti-Scraps called Twi-Girl Combo Pack by Cora's Creations.
The Quick tag I used is also by Cora and the direct link is here.
Masks of Choice: the masks I used came from Chelle under downloads. Her site can be found here.
I used WSL_81.
Image of choice. My image is by David Desbois. You can visit his deviantart site here. I have permission from him to use his artwork in my tutorials.
Plugins: If so desired I used EyeCandy4000, Gradient Glow which is no longer available but you can substitute EyeCandy 6.
I am all for Team Edward, but this was such a great kit! And the word art is perfect!
Open all supplies needed for this tutorial. Add the mask to your mask file or open them in PSP.
Open cc-quick-tag-01, Shift+D to duplicate the frame which will be the working layer. Starting at the bottom add a new layer and flood fill with white. Add cc-pp-06 and move to the right, duplicate, mirror and merge with the other paper layer. Apply WSL_81 to the paper layer. Merge group.
Add cc-pp-11 and then using your selection tool, make a box shape around your frame layers. Layers, invert and hit delete on your keyboard.
Add tube/image to the frames. See below for misting.
Misting an image is very easy. Using your magic wand, freehand selection, use these options:
 Click on the image and choose Promote Background Layer. Now, start anywhere in the image you want to begin. What you are going to do is left click to place the pointer and then move the line to the next point and click again to make a rough cutout of the portion of the image you would like to mist. When you are done, right click and the selection will be made. Then, hit delete on your keyboard once or twice to feather the image around it.
Add your elements of choice. See tag for exact placement and resize as necessary. I added:
cc-wooden-wolf to the bottom left.
cc-wa-01 middle of the frames.
cc-tag-01 bottom of the first frame on the left.
cc-wa-02 to the bottom right.
cc-dots-01 to the top left, duplicate, flip and mirror.
cc-moon flipped to the top left under the frame.
cc-logs to under the word art saying jacob.
cc-heart under the same word art.
cc-stone under the word art also.
Add any other elements of your choice. Drop shadow your layers and merge them where you would like.
Add your copyright at this time.
Add your text of choice. I used A&S Wizard for my text with the same shadows as above.

Labels:
Twilight
|
0
comments
Vampire Girl
Feel free to use my tutorial in any way you would like. Although it is my ideas that will guide you, please feel free to do whatever you choose with it!
This tutorial assumes you have a working knowledge of PSP.
Needed supplies:
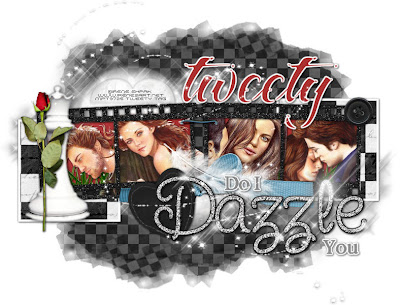
Scrap Kit of choice or the one I am using. This kit is by Pimp'd Designz and can be purchased at Sophisti-Scraps called Twi-Girl Combo Pack by Cora's Creations.
The Quick tag I used is also by Cora and the direct link is here.
Masks of Choice: the masks I used came from Chelle under downloads. Her site can be found here.
I used WSL_297.
Image of choice. My images are by Irena Shpak. You can visit MyPSPTubes here to purchase them.
Plugins: If so desired I used EyeCandy4000, Gradient Glow which is no longer available but you can substitute EyeCandy 6.
Open all supplies needed for this tutorial. Add the mask to your mask file or open them in PSP.
Open cc-quick-tag-02, Shift+D to duplicate the frame which will be the working layer. Image, Canvas Size, change to 600x600, center the image. Starting at the bottom add a new layer and flood fill with white. Add cc-pp-10 and move to the right, duplicate and mirror. Apply WSL_297 to the paper layer. Merge group.
Add cc-pp-09 and stretch it a bit to fit inside all of the frame layer and then using your selection tool, make a box shape around your frame layers. Layers, invert and hit delete on your keyboard.
Add tube/image to the right 2 frames. See below for misting.
Misting an image is very easy. Using your magic wand, freehand selection, use these options:
 Click on the image and choose Promote Background Layer. Now, start anywhere in the image you want to begin. What you are going to do is left click to place the pointer and then move the line to the next point and click again to make a rough cutout of the portion of the image you would like to mist. When you are done, right click and the selection will be made. Then, hit delete on your keyboard once or twice to feather the image around it.
Duplicate the step above for the other image on the right side of the frame. Merge down with the other misted tubes, then duplicate.
Add your elements of choice. See tag for exact placement and resize as necessary. I added:
cc-wa-02 move to bottom right. Using your selection tool, select the small words. Add a fat 3.0 white gradient glow.
cc-heart-02 under the word art and slightly rotated.
cc-feather over the words dazzle and the ribbon.
cc-button-02 top right of the frame.
cc-greens-03 under the frame in the first one to the left.
cc-flower-03 to the left of the chess piece.
cc-heart-01 over the moon layer.
cc-sparkle over the entire tag.
Add any other elements of your choice. Drop shadow your layers and merge them where you would like.
Add your copyright at this time.
Add your text of choice. I used A&S Snapper Script Light a pay font. Add a 3.0 fat white gradient glow. I also added a drop shadow to my text.

Labels:
Twilight
|
0
comments
February 27, 2010
Eclipse II
 Feel free to use my tutorial in any way you would like. Although it is my ideas that will guide you, please feel free to do whatever you choose with it!
This tutorial assumes you have a working knowledge of PSP.
Needed supplies:
Scrap Kit of choice or the one I am using. This kit is by Pimp'd Designz and can be purchased at Sophisti-Scraps called Eclipse Combo Pack by Cora's Creations.
Masks of Choice: the masks I used came from Chelle under downloads. Her site can be found here.
I used WSL_236.
Image of choice. My image is by David Desbois. You can visit his deviantart site here. I have permission from him to use his artwork in my tutorials.
Plugins: If so desired I used EyeCandy4000, Gradient Glow which is no longer available but you can substitute EyeCandy 6.
Open all supplies needed for this tutorial. Add the mask to your mask file or open them in PSP.
Open cc-eclipse-frame-01, Shift+D to duplicate the frame which will be the working layer. Image, Canvas Size, change to 600x600, center the image. Starting at the bottom add a new layer and flood fill with white. Add cc-pp-08 and move to the right. Apply WSL_236 to the paper layer. Merge group. Resize by 85% and then using your crop tool, crop to the tops of the mask layer, then Image, Canvas size 600x425 or so.
Add cc-pp-05 and then using your selection tool, make a box shape around your frame layers. Layers, invert and hit delete on your keyboard.
Add tube/image to the left 2 frames. See below for misting.
Misting an image is very easy. Using your magic wand, freehand selection, use these options:
 Click on the image and choose Promote Background Layer. Now, start anywhere in the image you want to begin. What you are going to do is left click to place the pointer and then move the line to the next point and click again to make a rough cutout of the portion of the image you would like to mist. When you are done, right click and the selection will be made. Then, hit delete on your keyboard once or twice to feather the image around it.
Duplicate the step above for the other image on the right side of the frame. Merge down with the other misted tubes, then duplicate. On the bottom layer, Adjust, Blur, Gaussian Blur 6. Change both layers opacity to Luminance.
Add your elements of choice. See tag for exact placement and resize as necessary. I added:
cc0glitter-splash to the center, and it should be just above the mask layer.
cc-cloud moved down a bit so it is peaking out the bottom of the frame.
cc-rose centered above the chess piece.
cc-key-charms above the frame layers, centered around the chess piece. Erase a small portion of the ring to make it appear as if it is hung on the chess piece.
cc-raven to the right top of the frame.
cc-sparkle centered over the frame layer.
Add any other elements of your choice. Drop shadow your layers and merge them where you would like.
Add your copyright at this time.
Add your text of choice. I used Pea Candace you should be able to find it via google. I also added a drop shadow to my text.

Labels:
Twilight
|
0
comments
February 20, 2010
Eclipse
 Feel free to use my tutorial in any way you would like. Although it is my ideas that will guide you, please feel free to do whatever you choose with it!
This tutorial assumes you have a working knowledge of PSP.
Needed supplies:
Scrap Kit of choice or the one I am using. This kit is by Pimp'd Designz and can be purchased at Sophisti-Scraps called Eclipse Combo Pack by Cora's Creations.
Masks of Choice: the masks I used came from Chelle under downloads. Her site can be found here.
I used WSL_249 and WSL_248.
Image of choice. My image is by David Desbois. You can visit his deviantart site here. I have permission from him to use his artwork in my tutorials.
Plugins: If so desired I used EyeCandy4000, Gradient Glow which is no longer available but you can substitute EyeCandy 6.
Open all supplies needed for this tutorial. Add the mask to your mask file or open them in PSP.
Open cc-eclipse-frame-04, Shift+D to duplicate the frame which will be the working layer. Starting at the bottom add a new layer and flood fill with white. Add cc-pp-02 and move to the right. Duplicate, mirror, flip and move to the left, merge down. Apply WSL_248 to the paper layer. Merge group. Add cc-pp-06 and move to the right. Duplicate, mirror, flip and move to the left, merge down. Apply WSL_249 to the paper layer. Merge group.
Add cc-pp-07 and then using your selection tool, make a box shape around your two frame layers. Layers, invert and hit delete on your keyboard.
Add tube/image to the left frame. See below for misting.
Misting an image is very easy. Using your magic wand, freehand selection, use these options:
 Click on the image and choose Promote Background Layer. Now, start anywhere in the image you want to begin. What you are going to do is left click to place the pointer and then move the line to the next point and click again to make a rough cutout of the portion of the image you would like to mist. When you are done, right click and the selection will be made. Then, hit delete on your keyboard once or twice to feather the image around it.
Duplicate the step above for the other image on the right side of the frame. Merge down with the other misted tube and change the opacity to Luminance.
Add your elements of choice. See tag for exact placement and resize as necessary. I added:
cc0glitter-splash to the left, duplicate, mirror and flip and move to the right. These two layers should be just above the masked layers.
cc-winged-heart centered and moved up to the top.
cc-moon to the top left of the tag.
cc-flower-01 to the middle of the two frame layers.
cc-sparkle underneath the word eclipse.
cc-ribbon-02 over the word eclipse. Erase portions of it to look like it is twirling in between the letters. The portions I erased are at the top of the C, the bottom of L, middle of the letter P, and the bottom of the letter E.
Add any other elements of your choice. Drop shadow your layers and merge them where you would like.
Add your copyright at this time.
Add your text of choice. I used Carpenter ICG a pay font. I also added a 3.0 fat white gradient glow to my tag with a drop shadow.

Labels:
Twilight
|
0
comments
January 23, 2010
Tut Stop Directory

Find ALL of my tutorials at the Tut Stop Directory! Let them know I sent you!
All tuts posted by Season, Holiday or Artist Last Name!

Labels:
Advertisements
|
1 comments
January 13, 2010
Team Edward
Feel free to use my tutorial in any way you would like. Although it is my ideas that will guide you, please feel free to do whatever you choose with it!
This tutorial assumes you have a working knowledge of PSP.
Needed supplies:
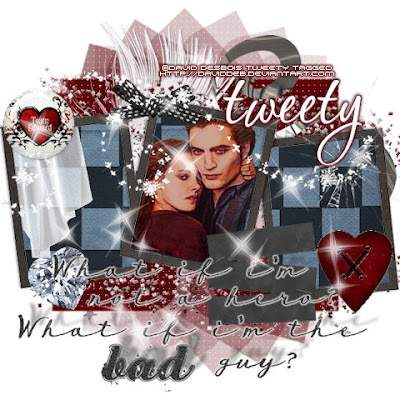
Scrap Kit of choice or the one I am using. This kit is by Pimp My Tags With Scraps and can be purchased at Pimp My Tags w/ Scraps called Twi-Team Bundle by Designs by Sarah & Cora's Creations.
Masks of Choice: the masks I used came from Vix under goodies. Her site can be found here
I used Vix Mask229.
Image of choice. My image is by David Desbois. You can visit his deviantart site here. I have permission from him to use his artwork in my tutorials.
Plugins: If so desired I used EyeCandy4000, Gradient Glow.
Open all supplies needed for this tutorial. Add the mask to your mask file or open them in PSP.
Open 600 x 600 tag. Starting at the bottom flood fill with white. Add cc-pp-03 as a new layer. Apply Vix Mask 229 to the paper layer. Merge group.
Add cc-frame-05 as a new layer. Add cc-pp-06 paper as the background. Using your magic wand, select inside the frame layers. Selections, Modify, Expand by 3, Selections, Invert. Hit delete on your keyboard on the paper layer. Add a drop shadow of -1, -1, 50, 3 to the frame.
Add tube/image to the middle frame. See below for misting.
Misting an image is very easy. Using your magic wand, freehand selection, use these options:
 Click on the image and choose Promote Background Layer. Now, start anywhere in the image you want to begin. What you are going to do is left click to place the pointer and then move the line to the next point and click again to make a rough cutout of the portion of the image you would like to mist. When you are done, right click and the selection will be made. Then, hit delete on your keyboard once or twice to feather the image around it.
Add your elements of choice. See tag for exact placement and resize as necessary. I added:
cc-stars on the bottom above the mask layer.
cc-feather above that to the top left.
cc-glitter centered as pasted.
cc-swirl-02 to the top middle on the frame.
cc-curtian rotated and moved to the middle left frame.
cc-team-edward-button to the top left of the frame.
cc-tabs to the right toward the bottom.
cc-diamond-heart to the bottom of the frame on the left.
cc-ribbon-01 to the top frame in the middle.
cc-wa-03 to the bottom middle of the tag placed under the frame.
cc-heart to the bottom right of the frame.
cc-sparkle-02 across the whole tag.
cc-sparkle-swirl across the whole tag. Move a bit so its off their face.
cc-shattered-glass to the top right of the last frame.
Add any other elements of your choice. Drop shadow your layers and merge them where you would like.
Add your copyright at this time.
Add your text of choice. I used P22 Corinthia a pay font. I also added a 3.0 medium red gradient glow to my tag with a drop shadow.

Labels:
Twilight
|
0
comments
January 12, 2010
Team Jacob

Feel free to use my tutorial in any way you would like. Although it is my ideas that will guide you, please feel free to do whatever you choose with it!
This tutorial assumes you have a working knowledge of PSP.
Needed supplies:
Scrap Kit of choice or the one I am using. This kit is by Pimp My Tags With Scraps and can be purchased at Pimp My Tags w/ Scraps called Twi-Team Bundle by Designs by Sarah & Cora's Creations.
Masks of Choice: the masks I used came from Vix under goodies. Her site can be found here
I used Vix Mask71.
Template: The template I am using is by Missy. You can download them from her site. There are links on the left you can use to download.
I used Template 278.
Image of choice. My image is by David Desbois. You can visit his deviantart site here. I have permission from him to use his artwork in my tutorials.
Plugins: If so desired I used EyeCandy4000, Gradient Glow.
Open all supplies needed for this tutorial. Add the mask to your mask file or open them in PSP.
If you are unfamiliar with a template it is very simple and easy to use. Basically, you click on the layer you wish to color. Then, Selections, Select All, Selections Float, Selections Defloat, Selection Invert (for papers) and then select the paper layer and hit the delete key on your keyboard. If you are using a flood fill color, just add a new layer and flood fill the selection. If you are using a round shape, you would also need to go to Selections, Smooth, 10 for settings, then Invert. I won't be writing these directions out every time.
Starting at the bottom this is what I added to the template.
Raster 1 - floodfill white.
Square 1 - drag Square 2 down under the frame 1 layer. Merge group. Copy and paste sb_pmt_team-jacob-pp10 as the paper.
Frame 1 - Merge this layer with Frame 2. Using your Manual Color Correction, change the frame from pink to white.
Square 2 - See square 1.
Frame 2 - See Frame 1.
Circle - sb_pmt_team-jacob-pp2 using "Paste INTO selection" choice.
Frame 3 - Using your Manual Color Correction, change the frame from pink to black.
thin rectangle 1 - keep as is.
thin rectangle 2 - Merge with thin rectangle 3. Copy and paste sb_pmt_team-jacob-pp8 as a the layer.
thin rectangle 3 - See thin rectangle 2.
dotted line 1 - Merge this layer with dotted line 2. Using your Manual Color Correction, change the frame from pink to white.
dotted line 2 - See dotted line 1.
Words - delete or hide.
by missy - delete or hide.
Add a drop shadow of -1, -1, 50, 5 to all template layers.
Open sb_pmt_team-jacob-pp7. Add your mask to this layer. Merge group. Resize to fit tag.
Add tube/image. See below for misting. I had to resize my tag by 80% for the tube to fit correctly.
Misting an image is very easy. Using your magic wand, freehand selection, use these options:
 Click on the image and choose Promote Background Layer. Now, start anywhere in the image you want to begin. What you are going to do is left click to place the pointer and then move the line to the next point and click again to make a rough cutout of the portion of the image you would like to mist. When you are done, right click and the selection will be made. Then, hit delete on your keyboard once or twice to feather the image around it.
Add your elements of choice. See tag for exact placement and resize as necessary. I added:
sb_pmt_team-jacob-full moon top left of tag.
sb_pmt_team-jacob-branch 1 rotated a bit to the left, under the circle frame layer. Duplicate and mirror.
sb_pmt_team-jacob-pawprints on top of the layers to the middle left.
sb_pmt_team-jacob-word art 1 to the top center.
sb_pmt_team-jacob-stitches to the bottom middle.
sb_pmt_team-jacob-button 1 on top of the "L" in loyal, on the top right of the tag.
sb_pmt_team-jacob-flair to the bottom right.
sb_pmt_team-jacob-rain 2 over top the whole tag.
Add any other elements of your choice. Drop shadow your layers and merge them where you would like.
Add your copyright at this time.
Add your text of choice. I used Almagro Regular font. I also added a 3.0 medium green gradient glow to my tag with a drop shadow.

Labels:
Twilight
|
0
comments
Subscribe to:
Posts (Atom)
About Me

Want to receive some of the tutorial tags created by me?

Click to join tweetytags


