Follow Me
Tag Corner
Join TagCorner! I did!
December 14, 2012
My Vamp Love
Feel free to use my tutorial in any way you would like. Although it is
my ideas that will guide you, please feel free to do whatever you choose
with it!
This tutorial assumes you have a working knowledge of PSP.
Needed supplies:
Scrap Kit of choice or the one I am using called My Vamp Love. This kit is by Pimptress at PMTw/S and can be purchased at PMTw/S Store.
Tube: Artwork © Sky Scraps. In order to use the image in this tutorial you MUST purchase it from SATC.
Direct link to the tube can be found here.
Plugins: If so desired I used EyeCandy 6: Gradient Glow.
Open all the supplies you wish to use for the tut. 600x600 tag.
Add pd12-frame-01 as the frame, with pd12-pp-02 as the frame background. Under the frame and paper layers I added pd12-print-02, pd12-print-01, and pd12-blood-03
Add your tube to the center of the frame and move to where you want it under the frame. Duplicate and move one above the frame. Delete portions sticking out over the frame. Drop shadow tube 1, 1, 80, 5.
I added the following elements. Resize as necessary and see tag for exact placement:
pd12-mesh-01 to the bottom of the tag on the frame.
pd12-flower-03 to the bottom left side of the frame.
Add any elements of your choice. Drop shadow elements of choice. Merge any layers you choose together.
Add your text of choice, I used all caps Copperplate-Gothic-Bold-Regular, noise 80, with a fat white 1.0 gradient glow twice, and drop shadow. Then I used EmilyLimePro, 1.0 medium gradient glow and drop shadow.
Add drop shadow as above. Resize tag if desired. Add your copyright at this time.
Hope you enjoyed this tutorial! Please feel free to send me your results!
Hope you enjoyed this tutorial! Please feel free to send me your results!

Labels:
Twilight
|
0
comments
November 26, 2012
Vampire Girl
Feel free to use my tutorial in any way you would like. Although it is
my ideas that will guide you, please feel free to do whatever you choose
with it!
This tutorial assumes you have a working knowledge of PSP.
Needed supplies:
Scrap Kit of choice or the one I am using called Vampire Girl. This kit is by Pimptress at PMTw/S and can be purchased at PMTw/S Store.
Tube: Artwork © Irene Owens. I purchased this image at MPT which is no longer in business. In order to use the image in this tutorial you MUST purchase it from CDO.
Plugins: If so desired I used EyeCandy 6: Gradient Glow. I also used Xenofex 2: Constellation (which is also an Alien Skin application) and can be found via google search if you don't already have it. Lastly I used Xero: Porcelain for the tube.
Open all the supplies you wish to use for the tut. 600x600 tag.
Add cc-frame-01 as the frame, with cc-pp-05 as the frame background, I resized mine until it fit into the frame. Between the frame and paper layer, add cc-glitter-circle.
Add your tube to the centered frame and move to where you want it under the frame. Delete portions sticking out under the frame. Drop shadow tube 1, 1, 80, 5. Xero: Porcelain, default settings: 50, 128, 128, 0, 0, 255. Change overlay to luminance (L).
I added the following elements. Resize as necessary and see tag for exact placement:
cc-sparkle centered over the entire tag.
cc-heart-01 to the bottom left, rotated left about 25 degrees.
cc-wa-01 to the bottom on the frame, centered.
Add any elements of your choice. Drop shadow elements of choice. Merge any layers you choose together.
Add your text of choice, I used digs my hart with a fat white 1.0 gradient glow, then Xenofex 2: Constellation with the following settings:
Add any elements of your choice. Drop shadow elements of choice. Merge any layers you choose together.
Add your text of choice, I used digs my hart with a fat white 1.0 gradient glow, then Xenofex 2: Constellation with the following settings:
Add drop shadow as above. Resize tag if desired. Add your copyright at this time.
Hope you enjoyed this tutorial! Please feel free to send me your results!
Hope you enjoyed this tutorial! Please feel free to send me your results!

Labels:
Twilight
|
0
comments
January 23, 2011
Twilight Obsessed

Feel free to use my tutorial in any way you would like. Although it is my ideas that will guide you, please feel free to do whatever you choose with it!
This tutorial assumes you have a working knowledge of PSP.
Needed supplies:
Scrap Kit of choice or the one I am using called Twilight Obsessed. This kit is by Roo and can be purchased at Scrappin Warehouse.
Tube: Artwork © Katerina Koukiotis. In order to use the image in this tutorial you MUST purchase it from DSI.
Masks of Choice: the masks I used came from Vix under goodies. Her site can be found here
I used: Vix_Mask433.
Plugins: If so desired I used EyeCandy4000: Gradient Glow, which is no longer available to purchase, but should be able to be found in the new EyeCandy 6.
Open all the supplies you wish to use for the tut. 600x600 tag.
Add TwilightObsessedPapers_SBR12 for the mask layer, add mask. Merge group.
Add TwilightObsessedElements_SBR25 as the frame, with TwilightObsessedPapers_SBR05 as the frame background, I resized mine until it fit into the frame. Add TwilightObsessedElements_SBR08 behind the frame. Back onto mask layer, resize to fit behind the frame.
Add your tubes to the frame. Drop shadow.
I added the following elements. Resize as necessary and see tag for exact placement:
TwilightObsessedElements_SBR34 to the bottom left on the frame.
TwilightObsessedElements_SBR35 to the top right on the frame.
TwilightObsessedElements_SBR28 to the bottom right on the frame.
TwilightObsessedElements_SBR39 to the bottom right on the rose.
Add any elements of your choice. Drop shadow elements of choice. Merge any layers you choose together.
Add your text of choice, I used Zephyr with a fat white 3.0 gradient glow, and a regular drop shadow as above.
Add your copyright at this time. Resize tag if desired.
Hope you enjoyed this tutorial! Please feel free to send me your results!

Labels:
Twilight
|
0
comments
January 1, 2011
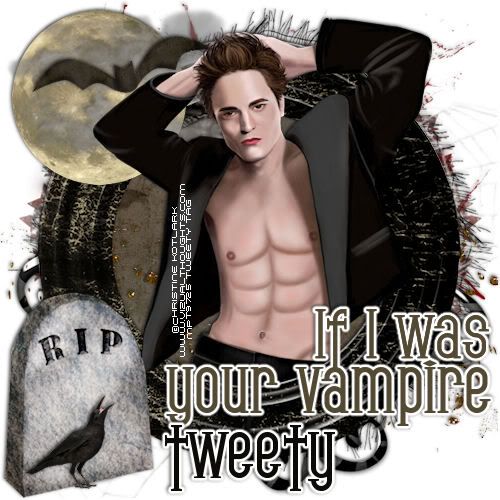
If I was your Vampire

Feel free to use my tutorial in any way you would like. Although it is my ideas that will guide you, please feel free to do whatever you choose with it!
This tutorial assumes you have a working knowledge of PSP.
Needed supplies:
Scrap Kit of choice or the one I am using called If I was your Vampire. This kit is by Pimp'd at PTMw/S and can be purchased at Pimp my tags with Scraps Store.
Tube: Artwork © Christine Kotlark. In order to use the image in this tutorial you MUST purchase it from MPT.
Masks of Choice: the masks I used came from Vix under goodies. Her site can be found here.
Vix_Halloween2010No7.
Plugins: If so desired I used EyeCandy4000, Gradient Glow which is no longer available to purchase, but should be able to be found in the new EyeCandy 6.
Open all supplies needed for this tutorial. 600x600 tag.
Add pd-pp-01 as a new layer, add Vix_Halloween2010No7, merge group.
Add pd-frame-03 as the frame. Add pd-pp-03 as the background image for the frame. Add pd-tulle under the frame layer.
Add your tube of choice to the middle of the frame. Duplicate and drag one above the frame layer. Using your eraser tool, erase portions over the frame that you don't want showing. Drop shadow bottom tube 1, 1, 80, 5.
Add your elements of choice. Resize elements as necessary. I added:
pd-blood-01 to the top middle above the frame layer.
pd-spider-web-02 above the blood layer.
pd-swirl-02 above the web layer.
pd-glitter-01 above the paper layer but under the frame layer.
pd-moon-01 above the frame layer to the top left corner.
pd-mist-01 over the moon layer.
pd-mist-02 over the moon layer.
pd-bat over the moon and mist.
pd-gravestone bottom left of the frame layer.
pd-raven over the gravestone at the bottom.
Add any other elements of your choice. Drop shadow elements of choice. Merge any layers you choose together.
Add your text of choice, I used gothican, added the words "If I was your Vampire", then added a fat white 3.0 gradient glow and a regular drop shadow as above, and my name.
Add your copyright at this time. Resize tag if desired.
Hope you enjoyed this tutorial! Please feel free to send me your results!

Labels:
Twilight
|
0
comments
August 12, 2010
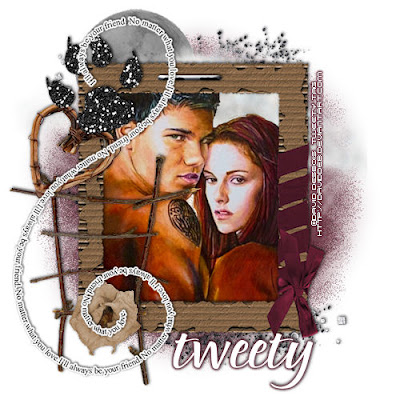
Forever Friends Bella & Jacob

Feel free to use my tutorial in any way you would like. Although it is my ideas that will guide you, please feel free to do whatever you choose with it!
This tutorial assumes you have a working knowledge of PSP.
Needed supplies:
Scrap Kit of choice or the one I am using called Forever Friends Bella & Jacob. This kit is a collaboration between Grunge & Glitter and Yarrow, and can be purchased at Digital Chaos.
Tube: Artwork © David Desbois. Please visit his deviantart site. I have permission from him to use his artwork.
Masks of Choice: the masks I used came from Chelle. Her site can be found here.
I used WSL_119.
Plugins: If so desired I used EyeCandy4000, Gradient Glow, which is no longer available to purchase, but should be able to be found in the new EyeCandy 6.
Open frame1 from Grunge. Canvas size 600x600 image center. Add a layer and flood fill white. Drag to bottom. Open Paper02 from Yarrow add as a new layer. Drop shadow frame 1, 1, 80, 5. Using your selection tool, select around the frame. Invert and delete the paper layer. Add Paper05 by Yarrow and add your mask. Merge group.
Add your tube of choice under the frame layer and drop shadow as above.
Add your elements of choice. Resize elements as necessary. I added:
From Yarrow:
GlitterSpray03 above the mask layer.
GlitterSpill above the spray layer.
StickLadder above the frame layer to the bottom left.
Staple01 to the top middle of the frame layer.
HeartElement to the middle on the left of the frame layer.
GlitterPawPrint02 to the top left of the frame.
WordArt01 to the middle left, fat white 3.0 glow.
From Grunge:
moon&cloud under the frame and paper layer at the top middle.
flower1 bottom left on top of the ladder.
Add any other elements of your choice. Drop shadow elements of choice. Merge any layers you choose together.
Add your text of choice, I used Pointed Brush, a pay font, and then added a 3.0 medium maroon gradient glow with the drop shadow as above.
Add your copyright at this time. Resize if wanted.
Hope you enjoyed this tutorial! Please feel free to send me your results!

Labels:
Twilight
|
0
comments
Subscribe to:
Posts (Atom)
About Me

Want to receive some of the tutorial tags created by me?

Click to join tweetytags


