Follow Me
Tag Corner
Join TagCorner! I did!
January 13, 2010
Team Edward

Feel free to use my tutorial in any way you would like. Although it is my ideas that will guide you, please feel free to do whatever you choose with it!
This tutorial assumes you have a working knowledge of PSP.
Needed supplies:
Scrap Kit of choice or the one I am using. This kit is by Pimp My Tags With Scraps and can be purchased at Pimp My Tags w/ Scraps called Twi-Team Bundle by Designs by Sarah & Cora's Creations.
Masks of Choice: the masks I used came from Vix under goodies. Her site can be found here
I used Vix Mask229.
Image of choice. My image is by David Desbois. You can visit his deviantart site here. I have permission from him to use his artwork in my tutorials.
Plugins: If so desired I used EyeCandy4000, Gradient Glow.
Open all supplies needed for this tutorial. Add the mask to your mask file or open them in PSP.
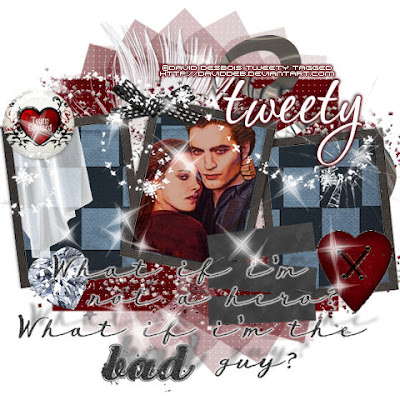
Open 600 x 600 tag. Starting at the bottom flood fill with white. Add cc-pp-03 as a new layer. Apply Vix Mask 229 to the paper layer. Merge group.
Add cc-frame-05 as a new layer. Add cc-pp-06 paper as the background. Using your magic wand, select inside the frame layers. Selections, Modify, Expand by 3, Selections, Invert. Hit delete on your keyboard on the paper layer. Add a drop shadow of -1, -1, 50, 3 to the frame.
Add tube/image to the middle frame. See below for misting.
Misting an image is very easy. Using your magic wand, freehand selection, use these options:
 Click on the image and choose Promote Background Layer. Now, start anywhere in the image you want to begin. What you are going to do is left click to place the pointer and then move the line to the next point and click again to make a rough cutout of the portion of the image you would like to mist. When you are done, right click and the selection will be made. Then, hit delete on your keyboard once or twice to feather the image around it.
Add your elements of choice. See tag for exact placement and resize as necessary. I added:
cc-stars on the bottom above the mask layer.
cc-feather above that to the top left.
cc-glitter centered as pasted.
cc-swirl-02 to the top middle on the frame.
cc-curtian rotated and moved to the middle left frame.
cc-team-edward-button to the top left of the frame.
cc-tabs to the right toward the bottom.
cc-diamond-heart to the bottom of the frame on the left.
cc-ribbon-01 to the top frame in the middle.
cc-wa-03 to the bottom middle of the tag placed under the frame.
cc-heart to the bottom right of the frame.
cc-sparkle-02 across the whole tag.
cc-sparkle-swirl across the whole tag. Move a bit so its off their face.
cc-shattered-glass to the top right of the last frame.
Add any other elements of your choice. Drop shadow your layers and merge them where you would like.
Add your copyright at this time.
Add your text of choice. I used P22 Corinthia a pay font. I also added a 3.0 medium red gradient glow to my tag with a drop shadow.
Labels:
Twilight
Subscribe to:
Post Comments (Atom)
About Me
Want to receive some of the tutorial tags created by me?
Click to join tweetytags
0 comments:
Post a Comment